ZyXEL ZyWALL VPN100

The ZyXEL VPN100 is the company’s lowest tier of VPN/SD-WAN appliance that is Rack Mountable. Other options are the VPN50 (not rack mountable), VPN300 and VPN1000 (both rack mountable).

The VPN100 includes 4x Gigabit LAN, 2x WAN, 1x SFP port, 1x DB9 console port and 2x USB 3.0 ports.

Similar to other ZyWALL products, the device can also provide AP Management services, with a default of 8 managed AP’s before additional licenses are required. Up to 72 wireless access points can be managed with the VPN100, though the recommended maximum access points per group is 60. In addition, the device supports up to 10 SP350E ticket printers for those wanting to use the hospitality gateway features, such as smaller coffee shops or hotels.

Also in alignment with other ZyWALL products, there are two basic versions of the device : the base hardware version, and the UTM bundled version. The UTM bundles include options for AntiVirus, AntiSPAM, Content Filtering and Intrusion Detection and Protection and GeoFencing. The UTM features can also be purchased separately in the event that, for example, you aren’t hosting your own email server behind the firewall.

One of the key features of the ZyXEL ZyWALL products is their support of IKEv2 for both site-to-site VPNs and for road warrior or client-server vpn connections. IKEv2 configurations can be created in a variety of configurations, with PSKs, certificates, EAP and combinations thereof supported.

Full specs can be found on the ZyXEL website at https://www.zyxel.com/us/en/products_services/VPN-Firewall-ZyWALL-VPN100/specifications

Ordering

DIY : ZyXEL ZyWALL VPN100 on Amazon

Hire ECLAT Tech : Call 503-629-9214 for project pricing including equipment.

Powershell – Add-VpnConnection errors in Windows 10 Version 1909

This document is straight up for sysadmins and PowerShell junkies (and Microsoft, assuming anyone from stumbles across this). Beginning somewhere around Windows 10, Version 1909 (18363.1256), an error appeared making long standing PowerShell scripts suddenly begin to fail.

The Commmand

Add-VpnConnection -Name ($ikename=Read-Host "VPN Name") -ServerAddress ($fqdnval=Read-Host "fqdn") -TunnelType Ikev2 -EncryptionLevel Maximum -AuthenticationMethod EAP -RememberCredential -SplitTunneling $true -PassThru

The Errors

If this command is run without elevated privileges, it will fail with the following error :

Add-VpnConnection : VPN connection test ikev2 cannot be added to the global user connections. : Access is denied.
At line:1 char:1
+ Add-VpnConnection -Name $ikename -ServerAddress $fqdnval -TunnelType ...
+ ~~~~~~~~~~~~~~~~~~~~~~~~~~~~~~~~~~~~~~~~~~~~~~~~~~~~~~~~~~~~~~~~~~~~~
+ CategoryInfo : PermissionDenied: (test ikev2:root/Microsoft/...S_VpnConnection) [Add-VpnConnection], CimException
+ FullyQualifiedErrorId : WIN32 5,Add-VpnConnection

It would be easy enough to assume, then, that this should simply be run with elevated privileges. And, indeed, the connection is created successfully. However if you return to a non-elevated PowerShell window and run the following :

Get-VPNConnection -Name $ikename

The connection will be appear to be missing, and generates the following error :

Get-VpnConnection : VPN connection test ikev2 was not found. : The system could not find the phone book entry for this
connection.
At line:1 char:1
+ Get-VpnConnection -Name "test ikev2"
+ ~~~~~~~~~~~~~~~~~~~~~~~~~~~~~~~~~~~~~~~~
+ CategoryInfo : ObjectNotFound: (asprv ikev2 36:root/Microsoft/...S_VpnConnection) [Get-VpnConnection], CimException
+ FullyQualifiedErrorId : VPN 623,Get-VpnConnection

It just doesn’t appear. To get it to appear, you must use the following :

Get-VPNConnection -Name $ikename -AllUserConnection

Which produces a result similar to the following :

Name : test ikev2
ServerAddress : host.eclat.tech
AllUserConnection : True
Guid : {F3FCC298-89EB-46C5-8D14-BFBD03FC1879}
TunnelType : Ikev2
AuthenticationMethod : {Eap}
EncryptionLevel : Custom
L2tpIPsecAuth :
UseWinlogonCredential : False
EapConfigXmlStream : #document
ConnectionStatus : Disconnected
RememberCredential : True
SplitTunneling : True
DnsSuffix :
IdleDisconnectSeconds : 0

The important part to note here is this line :

AllUserConnection : True

You can also see this in Control Panel\Network and Internet\Network Connections

Control Panel > Network and Internet > Network Connections Showing VPN Owner as System

Control Panel > Network and Internet > Network Connections Showing VPN Owner as System


Note the Owner column lists “System” instead of computername\username or domainname\username.

Digging Deeper

Turns out, now, despite the lack of a flag to set the connection as an All User Connection, when the command above is run, it stores the connection in :
%ProgramData%\Microsoft\Network\connections\Pbk\rasphone.pbk
If you open that document with a text editor, you will see only the entries that have been created as though they had been configured for AllUserConnection $true. But, why?

The bug

Turns out, the bug comes from the following flag :
-SplitTunneling $false
Note that there is nothing inherent to Split Tunneling that should suggest the VPN should automatically be changed from a “Current User” or “Me Only” to an “All Users.” Frankly, this is a security risk, too.

The Workaround

Okay, so, here’s the workaround – separate out the -SplitTunneling from the rest of the command, and add that in a second command. Note that it no longer matters if you add the connection from an elevated PowerShell prompt or not.
Add-VpnConnection -Name ($ikename=Read-Host "VPN Name") -ServerAddress ($fqdnval=Read-Host "fqdn") -TunnelType Ikev2 -EncryptionLevel Maximum -AuthenticationMethod EAP -RememberCredential -PassThru
Get-VPNConnection -Name $ikename | Set-VPNConnection -SplitTunneling $true

Now, you will see the correct owner listed in Network Connections, and the Get-VPNConnection command will display the connection without issue. However, there is still a problem.

More Bugs?

Remember that connection that appears with the owner as “System?” You want that gone, right? This is supposed to be the command to remove it :

Remove-VPNConnection $ikename -Force

But that produces the following error – whether in an elevated PowerShell window or not :

Remove-VpnConnection : VPN connection test ikev2 was not found. : The system could not find the phone book entry for this
connection.
At line:1 char:1
+ Remove-VpnConnection -Name "test ikev2 " -Force
+ ~~~~~~~~~~~~~~~~~~~~~~~~~~~~~~~~~~~~~~~~~~~~~~~~~~
+ CategoryInfo : ObjectNotFound: (test ikev2:root/Microsoft/...S_VpnConnection) [Remove-VpnConnection], CimExceptio
n
+ FullyQualifiedErrorId : VPN 623,Remove-VpnConnection

Not found? That can’t be right. You check rasphone.pbk – and it’s there. It shows up in Network Connections. WT[H,F]?
Remember, this is happening in an elevated PowerShell prompt. Still, you try this :

Remove-VPNConnection $ikename -AllUserConnection -Force

And it finally works. Now, that seems rather buggy, doesn’t it?!!! Fortunately, this one is rather consistent. Even in an elevated prompt, the Get-VpnConnection STILL won’t show all user connections without that -AllUserConnection flag. It’s a little irritating, especially since you can’t see ALL the vpn connections in a single list, but it can be useful if you are trying to find connections that are not supposed to be one way or the other.

Of course, by now you probably just want to rename that final successful entry, right? Yeah, good luck with that. Best just to delete and re-create or rename it through the GUI and move on.
Good luck!

Basic Steps for Using your own Router with Comcast Internet Service

I must preface this by saying that networking is hard, so no-one should feel badly about their abilities if you find this process challenging.

While adding a router into a network, even a home network, might seem like an easy thing, there are many details that often get overlooked. It is these gaps that result in internet speed issues, connectivity problems, and even getting hacked. The nature of networking, wireless, and security is also evolving and changing quickly, making it altogether more difficult.

If you are unfamiliar with IP addresses, the difference between public and private IP addresses (more generally, WAN vs LAN), DHCP, the difference between http and https , and/or firewalls, then I highly recommend you hire someone to help you with this part of the project. And, before you ask – no, Comcast will not help you with this, except to disable the wireless on their device and put it into bridged mode. Everything on your router is up to you, or whomever you hire.

If you still want to try this on your own, then, by all means, feel free to follow the basic steps that follow. Do keep in mind that this post is a basic overview, so you must be able to interpret some of these steps in a manner that is consistent with the particular equipment you are using.

Basic Connectivity

Generally, the basic setup is that your Comcast coax cable gets screwed into the F-Type connector on the DOCSIS modem. Unless you’re forced to rent this, the far cheaper, and more secure, option is to buy your own (new) modem.

If there’s only one Ethernet port on the modem you purchased, then that will be your connection between the modem and the WAN port on your router. If not, be sure that you are patching between the WAN port on yoru router and one of the LAN ports on the modem.

Now, you’ll use either wireless or (preferably) an ethernet cable to connect your computer (or tablet or phone) to one of the LAN ports on your router.  Don’t connect the router to the modem until you have changed the defaults on your router.

Last, but not least, is location. If this router is going to provide the wireless for your apartment or home, then you must be sure that it is located somewhere that ensures a good strong signal everywhere you plan to use it. Otherwise, you may need to consider adding in another wireless access point. Remember that the Ethernet cable that connects your router to the modem can be up to 100 meters long, so you have lots of flexibility in the placement of the router relative to the location of the modem.

Setup

This is where all the magic happens.

  1. Plug in and power on the router.
  2. Connect to the router from your phone or tablet, either via wireless or (preferably) via an Ethernet cable.
  3. Find the default IP address of the router, either from documentation, or by looking at the IP information on your device.
  4. Using a browser, login to your router and immediately change the default username and/or password (sometimes you can only change the password).
  5. If you know how to do so, feel free to change the IP address ranges of the LAN, or just leave them as they are.
  6. Change the Wireless SSID and Passwords for both the 2.4 and 5GHz Frequencies.
  7. If there are guest wireless networks enabled by default, either change them, or disable them to meet your needs.
  8. Check to see what IP address the WAN Port of your router obtained. If it’s in one of the private IP address ranges (like 10.1.10.x or 192.168.100.x), then you’ll need to log into the modem and make changes.
  9. Now you can connect your router’s WAN port to the LAN port on the DOCSIS modem.
  10. Login to the modem via the Gateway IP address obtained by the WAN Port on your router, or using the default IP address for your model, which should be in the documentation, or even a label on the modem.
  11. Immediately change the default username and/or password (sometimes you can only change the password).
  12. If there’s any wireless on the modem, turn it off – all of it. Find both the 2.4GHz and 5GHz frequencies and disable both of them. If this is a Comcast owned/leased modem, call them and ask them to turn all wireless off, because you will only be able to disable the LAN side wireless, but not the wireless they provide, for free, to everyone (called Xfinity) via the internet connection you are paying for.
  13. Now, disable DHCP on the LAN.
  14. Finally, set the modem into Fully Bridged mode (this is a made up term by Comcast – everyone else calls it bridged mode, but Comcast modems have both a “Bridged” mode, which really isn’t bridged, and “Fully Bridged” which really is bridged.
  15. Save and apply the changes as necessary.
  16. Check your router. You may need to renew the DHCP lease on the WAN interface.
  17. Confirm that it is receiving a public IP address. If it’s not, you’ll need to double check the router and make sure that it’s in bridged mode and start troubleshooting.
  18. Change the WAN DNS servers to something that’s not on Comcast servers – there are lots of reasons for this, just, seriously, do it. The easiest two to remember are Google’s free public DNS servers, 8.8.8.8 and 8.8.4.4.
  19. Confirm that you have full internet connectivity and check for and install firmware updates for your router.
  20. If you feel it necessary, add in a static route to allow you to manage the modem, but make sure you can also add a security policy on the router’s firewall that restricts that access, especially since the Comcast modems do NOT protect you against hacking that’s initiated from inside your network (including malware/virus infections, phishing, neighbors or guests (wanted or otherwise) connecting on wireless, fake technical support, and so on).
  21. Last but not least, never reset the Comcast modem to factory defaults – no matter what the Comcast tech support says, as this will wipe out the changes you’ve already made. At most, you might need to reboot the modem and/or router (better routers will almost never have to be rebooted, except when their firmware is being upgraded).


Good Luck!

In a nutshell, the steps above will allow get you up and running. Keep in mind that there are a lot of DOCSIS modems out there, and a LOT of routers out there. Each of them is different, so you’ll need to interpret the steps above to conform to your specific equipment and software.

Also, the steps above will NOT work with the Comcast static IP addresses. That’s a whole different bag of tricks. If you have Static IP addresses from Comcast you really should be hiring an IT professional who is well versed in networks and has Information Security expertise to help you.

And yes, ECLAT Tech is available to help with any and all of these needs.

Create a Google Account using your own Business or Personal Email Address

Google has a wide variety of applications available for people to use. Most are free, and most have additional paid options. To use these applications, each user needs a login ID and a password. That is simple enough, but it’s too easy to rush through the process, accept the defaults, and miss critical details – like the fact that you don’t have to create an @gmail.com address to use a Google Account. In fact, if you already have an email account, especially for your business, it is better that you DON’T create a separate Gmail account.

The easiest scenario to present in explaining this is as follows :

  1. Someone you know shares a Google resource with you. Perhaps that’s access to a Google Analytics account, a large (or sensitive) file attachment, a spreadsheet or document, a whole folder on Drive, or any of the other myriad products.
  2. Having received the invitation to access the file, you click the link and it prompts you to login.
  3. One of two things happens. Either,
    1. Since you don’t, yet, have an account, you step through the process of creating one. But, in your haste, you miss something and create a new @gmail.com email address.
    2. You login using your personal Google account, instead of creating one for your work.
  4. The person you know then receives an email response to the invitation that comes not from your email address, but from either the @gmail.com address you just created, or your personal @gmail.com account.
    1. Should that person trust the request they just received?
    2. Are you going to actively monitor this new account, and the email notifications that are sent to it?
    3. What will you miss if you aren’t checking this?
    4. Do you want your employer looking into your use of a personal account for business use?
    5. Do you want your personal email and drive account to be reviewed by other people in the event of a lawsuit against the company you work for?
      1. Do you, as an employer, want employees to take such a risk, when a free, and much more manageable alternative exists?
    6. As an employer, do you want an employee who leaves to take their access to data from business partners and clients with them, or would you rather have an opportunity to maintain control of that access?
    7. What other new, and unforeseen, security risks have just been opened up?

This is a very normal sequence of events (and a very short list of the risks). Fortunately, you can get things back under control, and significantly improve your account security, by following the steps below. Note that these steps are best for someone who has a brand new account they haven’t really used the account for more than one or two files. Following the steps below also has a side benefit of securing the use of a Google account using the email address @ your business domain against possible use by an unknown third party. And, let’s not forget – you can start this process, for free. Even if you never choose to expand beyond the free products, you still get a raft of the benefits.

Step by Step

Step 1

Nothing exciting here. Just click the “create account” link.
The Google Sign in Page

Step 2

If you are using this for work, either because you work for someone else, or own a business, Click “To manage my business.”

Google Account Creation Choose yourself or To manage my business

Step 3

This is THE single most IMPORTANT step in the entire process. Be sure to click the link that says “Use my current Email Instead.” I’ve added a blinking yellow arrow here to make it as obvious as possible. It is this step that allows you to take full control of the account, simplifying and improving the security of your account all at the same time.
Google Account Creation - Click Use my current email address Instead where Arrow is Blinking

Step 4

This is it! It’s the moment when you enter your existing email address. It doesn’t matter if it’s your very own @abc.xyz that you use at work every day, or (if this is for personal use), your @aol.com, @hotmail.com, @yahoo.com, @whateverotherdomain. The fact is, entering this, here, gives you one fewer email addresses, and simplifies and secures everything else moving forward.

Google Account Creation enter YOUR email address

Step 5 – Keep the Verification Code Page Open

This is a bit of a two part step. When you see the screen below, keep the screen open and check your email for a confirmation code. Then enter that code into this screen. Checking your email might be easier to do on another device, while you keep this open.

Google Account Creation Code Verification Page

Step 5 – Check your Email

You’ll need the code from your email to enter into the code screen. Remember to check your spam/junk folder, just in case it was routed there – not all email providers play nice, here.

Google Account Creation - the verification Email and Code

Step 6

Even if you intend to use multi-factor authentication, it isn’t entirely necessary to enter your phone number here, unless you really want to. The birthday is to verify that you are at least the minimum age to use the Google products. it’s just a quick computer check, not a background check, so, feel free to use the correct year, and then, say, December 31st – just be sure to note this “birthday” into your Password management vault in case you need it later. As for Gender, once again – Google doesn’t need to know. Their advertisers might, but, feel free to say “Rather not say.” The choice is there for your privacy – I recommend you take advantage of it.

Google Account Welcome - Gender and Age

Step 7

Privacy and Terms is a long, interactive document, that gives you the choice to opt into, or out of, various services, right from the beginning. Please do take the time to review the various toggle buttons to choose the privacy settings that are right for you, and your intended use of the Google products.

Google Account Privacy and Terms

Google Account Privacy and Terms

Step 8

Once you’ve completed the opt in/out process in Privacy and Terms, I do recommend checking the box to receive periodic reminders about Privacy settings. Things do change, over time, and it does help to have a prompt to review them periodically and make adjustments. Otherwise, click “I agree,” and that’s it! You’re done, and you now have control over your Google Account in much improved ways that will benefit you, and your business/privacy, for years to come.

Google Account Creation Privacy and Terms

Conclusion

It might seem like eight steps is a lot to complete just to create an account. But, given the confusion that I’ve seen result from NOT following these steps over the years, they really are 8 steps towards simplifying your life immensely. And, really, what else can you do to simplify your life in just 8 steps? Well, you could sign up for a password manager, but, then, that’s another post.

Bonne chance!

A Brief Apple iPhone and iPad Exchange Settings How to

Periodic problems synchronizing data between iPhones and iPads and Exchange servers, especially calendars make it necessary to stop synchronizing the calendar, which forces the calendar on the phone to be deleted, and then renew synchronization, which forces a refresh of all the data from the server. Note that this will cause any local changes made to your calendar from your device to be lost, so make note those changes or manually create them through Outlook Web Access first.

On your device, open Settings.

Scroll to and open Accounts & Passwords.

Settings iOS on Apple iPhone and iPad

Select your Exchange Account.

Accounts and Passwords Settings iOS on Apple iPhone and iPad

Move the green slider on Calendars to the left. It will change color.

Account specific Settings iOS on Apple iPhone and iPad

You should be prompted to delete or retain the local copy of your calendar – choose delete.

Close out of settings, open your calendar and confirm that the Exchange calendar is, indeed, gone.

Repeat the above steps, this time moving the calendar slider from left to right, which will make it green again. Your calendar should begin synchronizing normally once again.

Any number of circumstances can create this issue, and many are well documented. If this doesn’t work for you, you’ll need to reach out to your IT Administrator for further guidance.

Remove Microsoft OneDrive from Windows 10

As system administrators, we are commonly called upon to simplify the experience for our users. OneDrive is definitely a complication for everyone who doesn’t use it, or want it. It’s one of the first questions many Windows 10 users ask me about. When I first started running into the issue, I would just fix it one by one, but that became cumbersome, and I found that many of the resources I read missed steps that seemed at first to work, but later turned out to be incomplete, or just plain inaccurate. Now, it is still possible that something else will change in the Windows Operating System, or in OneDrive, that may make even this solution incomplete. If I discover that issue somewhere down the line, I will endeavor to update this post with new details.

Before we go on – if you are not a highly technically proficient user (preferably a professional or well trained Windows system administrator), I encourage you to stop now and call someone to help you. And, of course, make a backup of your system and/or registry before you continue. I am not here to support anyone but my paying customers, so I won’t be watching closely for comments. This is strictly informational to help IT Professionals to get their jobs done quickly. For those of you who know what to do with the following – have at it; I hope it helps.

Batch/CMD File

cls
set ODx86=”%systemRoot%\System32\OneDriveSetup.exe”
set ODx64=”%systemRoot%\SysWOW64\OneDriveSetup.exe”

taskkill /f /im OneDrive.exe

timeout /T 10

if exist %ODx64% (
%ODx64% /uninstall
) else (
%ODx86% /uninstall
)

timeout /T 10

rd “%userprofile%\OneDrive” /q /s
rd “%LOCALAPPDATA%\Microsoft\OneDrive” /q /s
rd “%ProgramData%\Microsoft OneDrive” /q /s

reg ADD HKEY_CLASSES_ROOT\CLSID\{018D5C66-4533-4307-9B53-224DE2ED1FE6} /t REG_DWORD /v System.IsPinnedToNameSpaceTree /d
0 /f

REG ADD HKEY_CLASSES_ROOT\Wow6432Node\CLSID\{018D5C66-4533-4307-9B53-224DE2ED1FE6} /t REG_DWORD /v
System.IsPinnedToNameSpaceTree /d 0 /f

REG ADD HKEY_CURRENT_USER\SOFTWARE\Classes\CLSID\{018D5C66-4533-4307-9B53-224DE2ED1FE6} /t REG_DWORD /v
System.IsPinnedToNameSpaceTree /d 0 /f

REG DELETE HKEY_CURRENT_USER\SOFTWARE\Microsoft\Windows\CurrentVersion\Explorer\Desktop\NameSpace\{018D5C66-4533-4307-
9B53-224DE2ED1FE6} /f

set “ODx86=”
set “ODx64=”

timeout /t 20

Sources :

The script above was compiled from a variety of sources, most notable are those listed below :

  • https://www.tenforums.com/tutorials/4818-add-remove-onedrive-navigation-pane-windows-10-a.html
  • http://lifehacker.com/how-to-completely-uninstall-onedrive-in-windows-10-1725363532
  • https://answers.microsoft.com/en-us/insider/forum/insider_wintp-insider_files/how-to-uninstall-onedrive-completely-in-windows-10/e735a3b8-09f1-40e2-89c3-b93cf7fe6994


DoubleAgent Vulnerability poses a risk to Security Software – Steps You Can Take

DoubleAgent is a vulnerability in the Microsoft code checking software that allows an attacker to replace that code checker with an alternative version. Once the alternate version is in place and the software using it checks for changes to its code based on the results, it reacts accordingly. This, in turn, allows an attacker to replace critical code, such as a security software’s own code, with code from an attacker. While it is impossible to know what changes an attacker might make, the list can include deletion of files, theft of data, and even remote control of the computer.

While every Windows operating system is potentially vulnerable, all versions of Windows from 8.1 and later use an additional layer of protection that most security software vendors already take advantage of, thereby reducing the risk. Windows 7 and older systems, however, have additional susceptibility.

What can I do?

To address this vulnerability on your computers, perform the following :

  1. Check to see if there is an alternate Administrative account on the computer. If not, create one.
  2. Remove Admin privileges from the primary account you use on each of your computers.
  3. Verify that the most recent version of your security software is installed.
    1. Update, if necessary
  4. Reboot when complete.

The Risks of an Admin Account

The reason for removing admin privileges is that this exploit, like many others, is toothless unless the logged in user has administrative privileges. Without those privileges, the code checker cannot be modified, which, in turn, protects the security software as well. While you have to have an admin account somewhere on your computer, and removing administrative privileges from your day to day account in itself does not secure against all threats, it does reduce the risk because the installation of a wide variety of software generates a prompt requiring the admin account’s username and password, which should be different than the one used in every day activities on your computer.

Microsoft Exchange Server 2016 Cumulative Update 14 – Nightmare

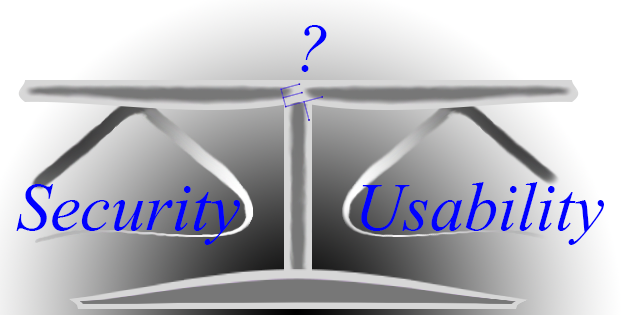
Q. What’s the long term impact of an update gone bad?

A. Aversion to subsequent updates resulting in postponement of future updates for as long as possible.

Cumulative Updates for Microsoft Exchange Server 2013

Microsoft Exchange Server 2013 LogoWith Microsoft Exchange Server 2013, we’ve changed the way we deliver hotfixes and service packs. Instead of the priority-driven hotfix release and rollup update model used by previous versions of Microsoft Exchange, Exchange 2013 now follows a scheduled delivery model. In this model, cumulative updates (CU), which address customer-reported issues and may include new functionality and/or features, are released quarterly. Critical product updates, which are packages that address a Microsoft-released security bulletin or contain a change in time zone definitions, are released as needed on a monthly basis for the most recently released CU and the immediately previous CU.
To get the latest version of Exchange 2013, download and install Microsoft Exchange Server 2013 Cumulative Update 14. Because each CU is a full installation of Exchange and includes updates and changes from all previous CU’s, you don’t need to install any previous CU’s or service packs first.
https://technet.microsoft.com/en-us/library/jj907309(v=exchg.150).aspx

Simple? Right?! Ha! Of course, if you’re reading this, you already know that.

Now, I’ll grant you. I walked into installation of Cumulative Update 14 in an effort to help resolve problems with an installation of an On Premises Exchange Server 2013 that had suddenly, and recently, begin having problems with OWA. So, there was already a problem before this. That said, the problems I encountered during this installation, which was a jump from Exchange Server 2013 Cumulative Update 7 (which had completed without a hitch) on a Hyper-V Guest on Windows Server 2012, could have been entirely addressed by better error handling when Microsoft prepped the CU – which would have saved my customer – and a lot of other people’s, too – a ton of money, and me a few hours of sleep. Many thanks to those in the forum and blogospheres for helping me solve this problem.

A couple of brief notes :

  • First, if you’re reading this, you are an IT Admin – no other reason to read this.
  • Second, you’re probably in crisis mode – so find your error and hit the solutions so you can move onto other fires.
  • Third, you’ve probably already rebooted a number of times after attempting various solutions – be prepared for one or two more.
  • Finally, and I cannot stress this enough, slow down. Seriously. Take a breath, and plan for this to take 2-3 hours, depending on infrastructure and replication time. Plan on coffee breaks and/or naps.

Prequisite Steps

  • Make sure you have backups.
  • Disable the Security Software on your Exchange Server until this is all complete.

Setup Errors

ServiceControl.ps1 cannot be loaded because you opted not to run this software now

Error:
The following error was generated when “$error.Clear();
& $RoleBinPath\ServiceControl.ps1 Save
” was run: “System.Management.Automation.PSSecurityException: File C:\Windows\Temp\ExchangeSetup\ServiceControl.ps1 cannot be loaded because you opted not to run this software now. —> System.UnauthorizedAccessException: File C:\Windows\Temp\ExchangeSetup\ServiceControl.ps1 cannot be loaded because you opted not to run this software now.
— End of inner exception stack trace —
at System.Management.Automation.AuthorizationManager.ShouldRunInternal(CommandInfo commandInfo, CommandOrigin origin, PSHost host)
at System.Management.Automation.CommandDiscovery.ShouldRun(ExecutionContext context, PSHost host, CommandInfo commandInfo, CommandOrigin commandOrigin)
at System.Management.Automation.CommandDiscovery.LookupCommandProcessor(CommandInfo commandInfo, CommandOrigin commandOrigin, Nullable`1 useLocalScope, SessionStateInternal sessionState)
at System.Management.Automation.CommandDiscovery.LookupCommandProcessor(String commandName, CommandOrigin commandOrigin, Nullable`1 useLocalScope)
at System.Management.Automation.ExecutionContext.CreateCommand(String command, Boolean dotSource)
at System.Management.Automation.PipelineOps.AddCommand(PipelineProcessor pipe, CommandParameterInternal[] commandElements, CommandBaseAst commandBaseAst, CommandRedirection[] redirections, ExecutionContext context)
at System.Management.Automation.PipelineOps.InvokePipeline(Object input, Boolean ignoreInput, CommandParameterInternal[][] pipeElements, CommandBaseAst[] pipeElementAsts, CommandRedirection[][] commandRedirections, FunctionContext funcContext)
at System.Management.Automation.Interpreter.ActionCallInstruction`6.Run(InterpretedFrame frame)
at System.Management.Automation.Interpreter.EnterTryCatchFinallyInstruction.Run(InterpretedFrame frame)”.

Solution
  1. Admin Powershell
  2. C:\Windows\Temp\ExchangeSetup\ServiceControl.ps1
  3. Answer [A]  for “Always Run”

credit : https://support.microsoft.com/en-us/kb/2034420

The Active Directory schema isn’t up-to-date, and this user account isn’t a member of the ‘Schema Admins’ and/or ‘Enterprise Admins’ groups

Welcome to Microsoft Exchange Server 2013 Cumulative Update 14 Unattended Setup
Copying Files…
File copy complete. Setup will now collect additional information needed for
installation.

Performing Microsoft Exchange Server Prerequisite Check

Prerequisite Analysis FAILED
The Active Directory schema isn’t up-to-date, and this user account isn’t a
member of the ‘Schema Admins’ and/or ‘Enterprise Admins’ groups.
For more information, visit: http://technet.microsoft.com/library(EXCHG.150
)/ms.exch.setupreadiness.SchemaUpdateRequired.aspx

Setup encountered a problem while validating the state of Active Directory:
Active Directory operation failed on thalamus.mdtclinics-sw.local. This error c
ould have been caused by user input or by the Active Directory server being unav
ailable. Please retry at a later time. Additional information: Active directory
response: The operation was aborted because the client side timeout limit was ex
ceeded. . See the Exchange setup log for more information on this error.
For more information, visit: http://technet.microsoft.com/library(EXCHG.150
)/ms.exch.setupreadiness.AdInitErrorRule.aspx

The forest functional level of the current Active Directory forest is not W
indows Server 2003 native or later. To install Exchange Server 2013, the forest
functional level must be at least Windows Server 2003 native.
For more information, visit: http://technet.microsoft.com/library(EXCHG.150
)/ms.exch.setupreadiness.ForestLevelNotWin2003Native.aspx

A Setup failure previously occurred while installing the PreSetup role. Eit
her run Setup again for just this role, or remove the role using Control Panel.
For more information, visit: http://technet.microsoft.com/library(EXCHG.150
)/ms.exch.setupreadiness.InstallWatermark.aspx

Either Active Directory doesn’t exist, or it can’t be contacted.
For more information, visit: http://technet.microsoft.com/library(EXCHG.150
)/ms.exch.setupreadiness.CannotAccessAD.aspx

The Exchange Server setup operation didn’t complete. More details can be found
in ExchangeSetup.log located in the :\ExchangeSetupLogs folder.

Solution Part 1

30 minutes or more, depending on replication time.

  1. Login to the DC (not the Exchange Server)
  2. Open Active Directory Domains and Trusts
    1. Right click your domain
      1. Choose Raise Domain Functional Level
      2. Verify that Current domain functional level is at least Server 2003
        1. Raise it on each DC to 2003.
      3. What IS the current Domain Functional Level?
      4. Click Cancel if there are no changes
      5. Repeat on additional Domain Controllers
    2. Right click “Active Directory Domains and Trusts
      1. Click Raise Forest functional level
      2. Verify that the Current forest functional level is at least 2003 AND that it is the same as your Domain functional level
        1. If necessary, Raise the functional level to the same as your lowest allowable domain functional level.
      3. Click Cancel if there are no changes
  3. Open Active Directory Users and Computers
    1. Check your user account’s Group Membership
    2. Verify the following :
      1. Member of “Enterprise Admins”
      2. Member of “Schema Admins”
      3. Primary Group Membership is an Admin membership group
      4. REMOVE account membership in Domain Users group.
  4. Admin PowerShell (on the primary DC)
  5. Navigate to the path of your extracted setup.exe for the CU
  6. [full path]\setup.exe /PrepareSchema /IAcceptExchangeServerLicenseTerms

Credit : Paul Cunningham : http://exchangeserverpro.com/exchange-2013-installing-cumulative-updates/
Credit : cdoctor Users group comment : https://social.technet.microsoft.com/Forums/Sharepoint/en-US/41256f43-8040-4fe2-ae73-4754f4ca7815/unable-to-install-exchange-2013-on-server-2012-server?forum=exchangesvrdeploy

Welcome to Microsoft Exchange Server 2013 Cumulative Update 14 Unattended Setup
Copying Files…
File copy complete. Setup will now collect additional information needed for installation.

Performing Microsoft Exchange Server Prerequisite Check

Prerequisite Analysis COMPLETED

Configuring Microsoft Exchange Server

Extending Active Directory schema COMPLETED

The Exchange Server setup operation completed successfully.

Solution Part 2

2 Hours to Complete

  1. Logon to the server running Exchange
  2. Admin PowerShell
  3. navigate to location of extracted CU files
  4. [full path]\setup.exe /m:upgrade /IAcceptExchangeServerLicenseTerms
  5. IF you still get the error, once again, double check the logged on account and verify that it is NOT a member of the Domain Users Group
    1. CU setup checks to see if the account is a member of Users. If it is a member of the Domain Users group, it assumes that the account is NOT a member of  Enterprise Admin and Schema Admins, even when it is, resulting in the erroneous error. The reasons aren’t important – just change the Primary Group membership to  something else, like Domain Admins, and remove your account’s membership in Domain Users, then repeat Step 4.
    2. In some cases, after changing group memberships, you’ll have to logoff, and then repeat Solution Part 2.
  6. Reboot the Exchange Server

Welcome to Microsoft Exchange Server 2013 Cumulative Update 14 Unattended Setup
Copying Files…
File copy complete. Setup will now collect additional information needed for installation.
Languages
Mailbox role: Transport service
Client Access role: Front End Transport service
Mailbox role: Client Access service
Mailbox role: Unified Messaging service
Mailbox role: Mailbox service
Management tools
Client Access role: Client Access Front End service

Performing Microsoft Exchange Server Prerequisite Check

Configuring Prerequisites COMPLETED
Prerequisite Analysis COMPLETED

Configuring Microsoft Exchange Server

Preparing Setup COMPLETED
Stopping Services COMPLETED
Language Files COMPLETED
Removing Exchange Files COMPLETED
Preparing Files COMPLETED
Copying Exchange Files COMPLETED
Language Files COMPLETED
Restoring Services COMPLETED
Language Configuration COMPLETED
Mailbox role: Transport service COMPLETED
Client Access role: Front End Transport service COMPLETED
Mailbox role: Client Access service COMPLETED
Mailbox role: Unified Messaging service COMPLETED
Mailbox role: Mailbox service COMPLETED
Exchange Management Tools COMPLETED
Client Access role: Client Access Front End service COMPLETED
Finalizing Setup COMPLETED

The Exchange Server setup operation completed successfully.

Mailbox server role isn’t installed on this computer

I would periodically encounter this message after a failed attempt at installing the CU.

Solution

Reboot the Exchange Server, verify the steps from the top of this post are all followed and you shouldn’t see this message again.

Post Install Steps

 I’m only adding this as a reminder, because, odds are, it’s late at night or the wee hours of the morning and you’re sleep deprived:

  • Re-enable Security Software
  • Verify functionality of :
    • EAC
    • OWA
    • Outlook Client

With any luck, it didn’t cost you a full day just to get here. For me, this was a two day ordeal, especially since each attempt plus server restart costs a good 20-40 minutes. I read some commenters say it took them three days to get their CU installed successfully. No server patch installation should be this much of a nightmare.

A couple more resources :

Good luck!

Security versus access – the balance between usability and security.

ECLAT Tech Scales Balancing Security and UsabilityOn a recent morning I logged into my online bank account and noticed the following message :

Beginning Nov. 2, we will no longer support the delivery of Secure Access Codes to email addresses. You can still have Secure Access Codes delivered by phone call or SMS/text message, just as you can today. To update Secure Access Code delivery locations go to Settings > Security Preferences.

As a translation, that means that they would no longer be sending emails with the secure codes to access a bank account. Why? It’s because that code is typically sent when a new computer logs onto the account. So, if someone has stolen a device, and that device has the email account pre-saved and automatically logging on, then having the code sent to your email leaves your bank account (or credit card, retirement account, line of credit etc.) vulnerable. In short order, a thief can take ownership of your account and do with it what they will.

Two Factor Authentication

To help reduce this risk, when you login to a new computer (or the system thinks it is new), a code is sent to a separate device, which adds another “factor” to the login process – hence the name, “Two Factor Authentication.”  Adding this factor introduces the idea being that, hopefully, the other device isn’t stolen (or hacked into) as well, or is locked with a separate set of authentication. In the ever changing world of security, this second factor is a pretty good idea, and it has saved people’s data, and even bank accounts. That said, there are, of course, problems.

Reduced Accessibility

In the world of technology, there are basically two driving forces – usefulness, and safety.  Ultimately safety is intended to improve usefulness, but, especially during the development stages, the two can clash and, when they do, the impact on usefulness can diminish the adoption of the technology. This is especially true of two factor authentication, which immediately assumes that you actually HAVE two separate devices. Setting aside those who strictly use mobile platforms, there is a whole world full of people who don’t have mobile devices. These groups include the elderly, those with disabilities that preclude the use of mobile devices, new immigrants, and the most socio-economically disadvantaged in society. All of these groups are actually harmed, not helped, by two-factor authentication.

So, when you think it’s just plain annoying to have to wait until a text message appears on your phone, imagine someone who either doesn’t have one, or who can’t physically manipulate one, even if they did.

Options

Those people who are faced with this conundrum do have options – but it takes some preparation, and tends to decrease the effectiveness of two factor authentication. The first step is to set up a phone number on a platform that allows for email forwarding of SMS messages, like Google Voice, for example. Next is to add this account to the online banking setup, and use it for the two-factor authentication. Now, when text messages with codes are sent, they arrive via email, just as they always did. It’s not as secure, but, given the option between using the account and, say, paying for a wheelchair accessible ride to the bank, this is probably the way to go. Just remember to use an email platform that supports decent security, and a password that doesn’t just use words you can find in the dictionary.

Flawed Logic

Two-factor authentication isn’t perfect, but it is a useful method of decreasing unauthorized access to accounts. Still, it is based on some flawed logic, some of which I have already discussed, but the most obvious one is this : mobile device access. The basic premise of two-factor authentication is that there are two separate devices involved in the process. But, for the majority of young people today, almost all activity is performed on a mobile device, whether it’s making phone calls, sending text messages, watching YouTube videos – or online banking. Since smart phones have the ability to use a web browser, this makes it possible to generate the secure code request on the same device that receives the message. If that device doesn’t have a password, pin or other mechanism to secure it against unauthorized access, or if the SMS messages themselves can be viewed even when otherwise locked, the entire multi-factor authentication mechanism breaks down.

What do I do?

So, you know that there are workarounds, and flaws, so, you may be asking yourself “what do I do?” As crazy as it may seem, I still believe there are distinct advantages to two-factor authentication. Ultimately, though, you’ll have to decide for yourself, on a case by case basis. The world of technology is complicated, and the see-saw between usefulness and security will continue to tip back and forth. Add in devices like smart TVs, network backups, and internet capable lights and thermostats, and all of a sudden things become much more complicated. When it becomes too much, that’s when it is time to call in an expert for a consult. Find one near you that you can trust on an ongoing basis – because this isn’t going to get any easier, or less confusing, anytime soon.

We’re falling behind on system security updates and Google and Apple are to blame

Security updates on personal devices are critical. But many people don’t do them. Now, limiting the blame to just two companies is understating the issue, and if all this sounds a little harsh, stick with me, and I’ll explain, beginning with an analogous scenario.

We have updated your car

We have updated your car, patching security problems, improving performance, and adding exciting new features we think you will like. Sedan Coupe blendYou are driving to work, and it is your day to carpool. You drive your 4 door sedan and pick up 4 people. While on your drive to work you find out that your car needs to be updated to fix a major security problem. Seems someone can remotely turn on your turn signal without you knowing about it, making you the person driving down the road for 30 minutes without changing lanes or turning. Well, you certainly don’t want that so, when you reach work and park your car, you push the update button and walk into work with your car pool buddies. At the end of the day, though, your whole crew comes out of the office, ready to go home and discover that the update has also changed your 4 door sedan into a 2 door sports coupe. Sure, the blinker can’t be turned on remotely, anymore, but, seriously?!

Time goes on, your buddies found their own ways home, they have finally stopped giving you grief for updating your car, and you’ve learned to live within the limitations of the 2 door sports coupe. It does, after all, have some handy features. Now, however, you’re back on the road, heading out on date night with your significant other, and you hear that there is a major security flaw affecting your car. Turns out your cars brakes can be remotely applied. Now, this worries you, and you’d like to apply update that fixes this, but, you don’t actually apply it. Sure, it leaves you vulnerable to unexpectedly stopping, maybe even causing an accident, but, if you do apply the update … what else is going to happen? Will you return to your car and find out that it is now a freight truck?

Combining GUI and security updates is the real culprit

If you followed the analogy, it’s pretty much the same on your phone or tablet. Basically, your device offers you an update, and you refuse to apply it for months, even years, even though you want to fix the security flaws, because you have learned, by now, that updating also affects the way that your device looks and functions – the GUI, or Graphical User Interface. And this is what Google and Apple have yet to learn – combining GUI and security updates is the real culprit. If the general public is going to willingly apply fixes for major security flaws in a timely fashion, then those fixes MUST stand apart from the graphical user interface updates. Otherwise, every time someone settles into their comfy device, they’re going to want to stay there, without the risk of it changing to something unfamiliar.

Time marches on – we must move with it

While it is absolutely true that time marches on, and, yes, we must move with it, there is also a limit to the rate at which people can change. Exceed that speed and people become overwhelmed, and they sprint back to an earlier state of being as rapidly as possible. Consider how long Microsoft Windows XP was the primary operating system on desktop pcs – 2001 until 2015 (later in some cases). Why? In part, it is because people get comfortable with the way things look. Updating from Windows 95 to XP was easy – they looked, and felt, the same. Updates to that operating system did not impact that overall feel. Contrast that with the change in Microsoft Office between 2003 and 2007, and people still haven’t stopped complaining about the change in the interface.

In the world of smart phones and tablets, however, change has been a constant. It’s hard to go more than a month before something on a device is changed, assuming regular updates. Each of those changes affect privacy settings and the overall feel of applications. The constant changes, and time involved in updating, impacts our lives, our flow, our schedules, and the efficiency with which we can operate. Anything that impinges on that flow is something that we, as human beings, put off as long as possible. Major phone vendors typically recognize this, and they change the basic function of the operating system, whenever possible, to limit the number of changes that occur when a security patch is rolled out. Unfortunately, they, too, are becoming part of the problem, as they are so slow to roll out the updates, that devices are left vulnerable for extended periods of time.

Ok. So, what’s the fix?

In the short term, there’s very little we can do to influence the major companies to change their basic operating procedures. That said, Google seeks Feedback, and Apple Feedback is possible, too. Of course, you can also turn to social media to publicly post your feedback, or turn to a larger platform, like Change.org, and create and promote, or participate in, petitions. In the meanwhile, I do encourage you to update your devices. It’s a tough pill to swallow, I know, but it’s one that is necessary, at least until the security patches are finally separated from the comfortable look and feel of the apps we know and love.